One of the most common questions we are asked by our customers is: "Will I be able to construct my own polytunnel?" The answer is yes, you will! Building a polytunnel really is a two person job, so why not invite a friend to join you and get stuck in.
Below we have listed other commonly asked polytunnel construction questions.
A Parts Check List and full Construction Guide is supplied with every polytunnel order. Please use these documents together and take the time to carefully read through the Construction Guide before you head out into your garden and begin building your 'Premier' polytunnel.
You can also view all of our Construction Guides via our Useful Downloads.
Questions
Answers
How are Polytunnels constructed?
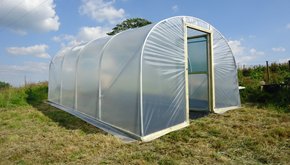
Polytunnel construction has remained the same since their inception and has proved reliable, simple and effective. Sections of Z35 high tensile galvanised steel hoops are placed at regular intervals and held together with steel stabilisers and ridge. Polytunnels are normally placed straight onto a soil base with the only preparation being a simple site clearance.
At Premier Polytunnels we have designed a simple clamping system, which is used almost universally throughout the structure, and this allows fully adjustable fixing and no worries about using the wrong bracket for the wrong job. For a standard polytunnel, a trench is dug around the outside of the framework and the one-piece cover is buried into the trench, resulting in a structure firmly anchored to the ground. Most importantly, the polythene cover should be as taut as possible.
We have a full collection of online construction videos on our YouTube channel - take a look at the video below for an example.
Back to Top
What orientation is best?
Don’t worry - it really doesn’t matter! You can only place a polytunnel where you have available space and where the landscape allows. If you do have a choice, we recommend constructing a polytunnel side on to the prevailing wind, allowing the wind to travel up and over the curved roof.
Some people worry about the North to South and East to West orientation with regards to the amount of sunlight the polytunnel will receive, but again we say “don’t worry - it really doesn’t matter!” Bearing in mind that a polytunnel gets very hot on a sunny summer’s day, having shading or partial sunlight during the day is not a bad thing!
Back to Top
Can Polytunnels be built on a slope?
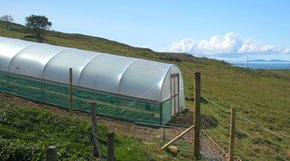
Yes. Your construction site should be clear and reasonably level from side to side. Approximately 6-inch out of level can be accounted for by adjusting the foundation tubes of your polytunnel. On the high side of the slope, drive the foundation tubes in a bit further than is normal and leave the foundation tubes on the low side of the slope protruding a bit further than normal. (Normal is whereby only the swaged section of the foundation tube protrudes from the ground).
A slope from end to end does not have to be taken into account as your polytunnel can be built straight onto this slope with the framework placed at the vertical.
To accommodate a larger slope, longer foundation tubes can be supplied - please contact the Sales Team to advise if longer tubes are required.
Back to Top
Can I move or extend my Polytunnel?
Yes, although we would suggest this is done when the polythene cover requires replacing in order to keep costs down. A new larger cover will be needed if extending the polytunnel and is very likely to be needed if moving the polytunnel to a new site.
Back to Top
How long does it take to construct a Polytunnel?
A polytunnel is not a difficult structure to construct, but the task at hand should not be taken lightly - after all, this is a building that must stand up to extreme weather conditions year after year, and should not be thought of as a tent. We often say that constructing a polytunnel is a bit like putting together giant meccano and while many of our customers can build a standard garden tunnel over a weekend, there are many factors that determine how long it takes. Digging conditions, weather, the size and specification of the polytunnel, and DIY skills all factor into the time it takes. Building a garden tunnel really is a two person job, so why not invite a friend to join you and get stuck in.
When it comes to building a polytunnel from Premier Polytunnels, we are confident that our simple and user-friendly design will allow even the most novice DIY-er to build your own polytunnel without any problems.
Premier Polytunnels supply a detailed Construction Guide with every polytunnel, which includes step-by-step instructions and accompanying photographs. Together with the Construction Guide, our customers receive a detailed ‘Polytunnel Parts Check List’ to help them identify each polytunnel part. Making full use of these documents together will help your build immensely and save time identifying parts.
We have a full collection of online construction videos on our YouTube channel, starting with measuring out the foundations all the way through to covering a polytunnel.
Premier Polytunnels are proud to have been the first polytunnel company to offer an out of hours Construction Advice Helpline, and we continue to be the ONLY company to offer this after sales support 7 days a week until 9pm. Contact our Construction Advice Helpline on 01282 811250.
View all of our Construction Guides via the Useful Downloads page of our website.
Back to Top
What is the difference between Anchor Plates and Base Plates?
Anchor Plates are used for fixing polytunnels into a soil base and replace the need for concrete. Base Plates are used for fixing polytunnels to a hard standing base, such as concrete or flags.
Anchor Plates or Base Plates MUST be used when using the Timber Base Rail or Aluminium Base Rail method of fixing and securing the polythene cover.
Back to Top
Is the Polytunnel Cover shaped?
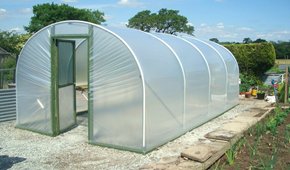
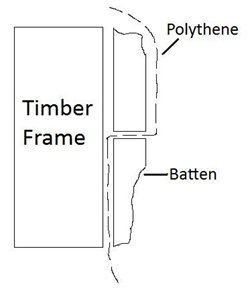
No. “Real” polytunnels are not supplied with a shaped cover. A one-piece polythene sheet is pulled over the polytunnel frame, and is secured by being buried in a trench or by being fixed to base rails at ground level, and by being fixed to timber door frames at each end.
Our polytunnel covers are not green covers with roll-up blinds or zip doors - our covers are the real deal.
Back to Top
Is there an inside and an outside on the Polytunnel Cover?
Yes. Here at Premier Polytunnels we pride ourselves on offering the very highest quality Thermal Anti Drip polythene - the preferred cover of UK growers. This Thermal Anti Drip polythene must be placed with the Anti Drip side facing inside.
The word “INSIDE” is written within the logo - as long as you can read the word “INSIDE” left to right as normal when you are standing inside the tunnel, the cover is the right way round.
The outside/top layer of this polythene film includes Anti Dust additives, making it more difficult for dust to remain on the polytunnel plastic and making it easier for the wind, rain and your cleaning efforts to remove any accumulated dust from the outside of the tunnel.
Back to Top
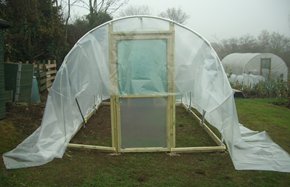
The Polytunnel Cover does not seem big enough/does not reach the floor at the ends - Do I have enough polythene?
Yes. The polythene is only required to come around the ends of the polytunnel to the door posts and this distance is shorter than the height of the polytunnel, therefore the polythene usually only hangs halfway down the ends when the cover is centralised over the frame.
Back to Top
Is it better to use the 'trenching' method or a Base Rail for securing the Polytunnel Cover?
The trenching method is suitable for all polytunnels (up to and including 24ft wide) constructed on a soil base. On all of our garden tunnels we offer the option of Cover Tensioning Tubes which allow the hoops to be raised to tension the cover when trenched into the ground. However, in our experience, the greater the length of the polytunnel or when digging conditions are difficult, base rails are a simpler option. Base rails also have the advantage of being adjustable to allow for cover tensioning, therefore guaranteeing a drum tight polytunnel cover.
Please Note; If base rails are used, it is necessary to use Anchor Plates to secure the steel polytunnel frame into the ground to prevent it lifting, even in the most severe weather conditions.
Even when using base rails, burying any surplus polythene ensures the base of the polytunnel is sealed against pests and draughts.
Premier Polytunnels Tip: Lay the surplus polythene along the ground and cover in chippings - this prevents weeds from growing up to the sides of the polytunnel and keeps garden tools (particularly strimmers) away for the polythene, and keeps the area around the polytunnel clean and tidy.
Click here to watch our YouTube video showing how to cover a polytunnel using the trenching method.
Click here to watch our YouTube video showing how to cover a polytunnel using base rails/side rails.
Back to Top
Do I need to tension the polythene when using Aluminium Base Rails?
Because of the nature of the system, we recommend that when the cover is pulled down to the aluminium grip rail, it is done lightly just to smooth out the creases. The polythene should then be pushed into the grip rail before gently inserting the PVC infills. If too much tension is placed on the polythene and the PVC infills forced into the grip rail, the polythene may be damaged or cut.
Final tensioning of the cover can be made after fitting, when the grip rail is lowered.
Back to Top
Do I need to wait for a warm day/until summer before fitting the Polytunnel Cover?
No. Although a warm day is preferable as this gives the polytunnel plastic more flexibility, a warm day is not essential to get the cover tight, especially if you have the option to re-tension the cover after fitting.
A calm day is without doubt necessary as you are effectively opening a large sail.
Find out more about covering a polytunnel here.
Back to Top
I cannot get the self drill screws to "bite" into the steel. What should I do?
Self drill screws are designed to drill their own hole and tap into position. These screws are held in the nut driver supplied with all of our polytunnels. The method we find best is to start slowly and once the screw has begun to bite, press firmly and increase speed. You may find it helps to drill a small pilot hole on the steel first. P Clips have two small holes as a starter point for the screw. Extra pressure may be required when fitting a screw to a harder section of steel, such as the weld.
Back to Top
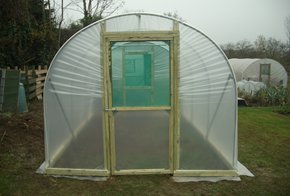
Do doors open inwards or outwards?
Our hinged doors are designed to be opened inwards and this prevents wind damage when left open. If the door is opened to 90°, this takes up no more room inside the polytunnel than what is required for a person to enter. However hinged doors can be opened outwards if required. Simply fix the hinges in the desired position. You can always change your mind at a later date and swap your doors round simply by unscrewing the hinges and re-hanging the doors.
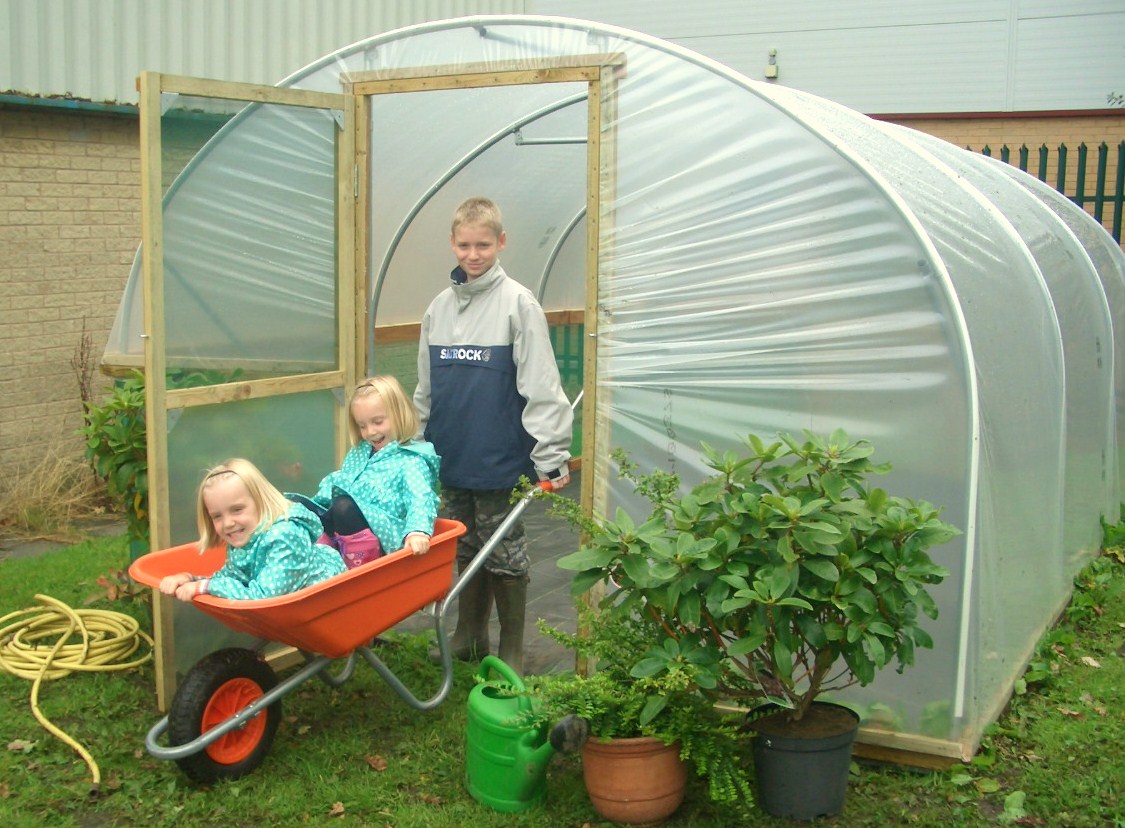
Here at Premier Polytunnels we supply wide single doors on polytunnels greater than 6ft wide. Our doors have an opening of up-to-2ft 8in wide to allow ample access for wheelbarrows and wheelchairs. (Our 6ft wide garden polytunnels have a door opening of up-to-2ft 2in, and our commercial polytunnels are supplied with double doors at each end with an opening of up-to-5ft 11in or 8ft.) All of our doors have been designed with a timber frame and are hinged, therefore are much stronger and wind resistant than the roll-up blinds offered by many other companies.
?width=260&height=188)
Back to Top
Are the timber door frames and doors cut to size?
The timber for the polytunnel doors is supplied cut to size.
Depending on the size of polytunnel, the timber supplied for the door frames may need to be cut to size to fit your chosen polytunnel. We supply surplus timber for the door frames to ensure customers have leeway for measuring and for those customers who are building their polytunnel on a slope.
The timber batten supplied for the doors and frames may need to be cut to size.
Back to Top
The battens in my packs of timber are not smooth on all four edges - Can I still use them?
 To keep costs down and help to protect our environment by using sustainable timber products, Premier Polytunnels use 19mm x 38mm treated timber batten, which is most commonly used as slate lathes when re-roofing a house with slates.
This batten is produced from fast grown spruce, which you will see in many man-made sustainable forests, and is not designed to be machined to a planed all round finish. Battens produced from the centre of the tree trunk will be smooth on all four sides, however when battens are produced from the outside of the trunk it is common for the battens to show signs of the outer bark. When building a polytunnel only two sides of the batten are required to be smooth - any of the other sides showing bark only adds to the rustic appearance.
This can be misinterpreted as poor quality timber - please be assured that, from our experience, treated batten will outlast the polythene cover that it is securing and may simply need replacing when fitting a new cover.
Back to Top
What should I do to protect my Polytunnel when it gets windy/when it snows?
A British winter can be very wild! We recommend securing your polytunnel against strong winds and storms by ensuring that door catches are fixed tight and that doors and side vents are secure. Doors which rattle in gales can be reinforced using timber braces or a heavy weight against the door.
During gales and storms be on the lookout for flying debris or branches which may fall and puncture the polytunnel cover. Polythene Repair Tape is always handy to have on standby for unforeseen mishaps.
We recommend that heavy snowfall is brushed off the polytunnel as soon as possible. The weight of a big snowfall can put strain on the frame and may cause the polythene cover to stretch and sag if left to lie on the roof.
Remove excess snow by tapping on the sides of the polytunnel cover, and on the roof inside if you can reach! Use a soft brush to gently knock snow from the harder to reach areas/roof.
Hints and Tips from our customers:
Use a gas or electric heater inside the tunnel to turn up the temperature and encourage the snow to slide off!
‘BELT AND BRACES’ METHOD - Tried, tested and recommended by a customer on the Shetland Isles.
In very heavy snowfall support the curved roof with timber struts inside the tunnel, positioned from the ground up to the centre of the hoops (excluding the end hoops).
Back to Top
I'm planning to construct my Polytunnel at a weekend - Can I still contact you?
You certainly can! We know you may only have time to build your own polytunnel at the weekend, over a Bank Holiday, or on late spring/summer evenings. Therefore, we decided to make sure that you can always contact our ‘Premier’ Construction Team to pick their brains and so we set up our out of hours Construction Advice Helpline - if you have any queries or questions when building your ‘Premier’ polytunnel, we are only a telephone call away with all the answers. (Please have your Parts Check List to hand when you call).
Premier Polytunnels are proud to have been the first polytunnel company to offer an out of hours Construction Advice Helpline, and we continue to be the ONLY company to offer this after sales support 7 days a week until 9pm.
Contact our Construction Advice Helpline on 01282 811250.
Back to Top
I still have a question.
Please do not hesitate to contact us by e-mail at info@premierpolytunnels.co.uk or by telephone on 01282 811250. We will be happy to answer any further queries or questions you may have regarding the construction of our polytunnels. (Please have your Parts Check List to hand if calling our Construction Advice Helpline).
We also have a list of non-construction-based FAQ's here.
Back to Top