How To Buy The Best Allotment Polytunnel
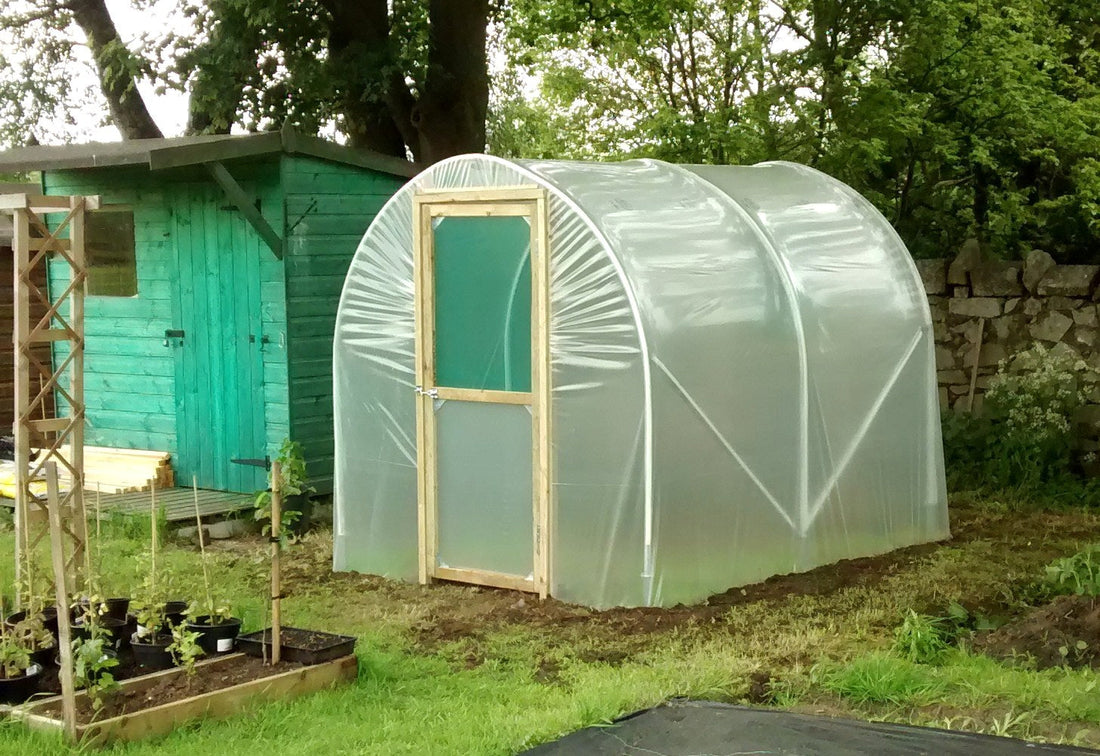
An allotment polytunnel can make a surprisingly big difference to what you can grow. It gives you a sheltered space to start crops earlier, keep growing for longer and protect plants from the changeable British weather – all while making good use of a limited amount of growing space.
Introduction
An allotment polytunnel can make a surprisingly big difference to what you can grow. It gives you a sheltered space to start crops earlier, keep growing for longer and protect plants from the changeable British weather – all while making good use of a limited amount of growing space. At Premier Polytunnels, we have been designing and manufacturing polytunnels in Lancashire for more than 35 years, and we know that choosing your first tunnel can feel like a lot to take in.
So, if you’re looking for the best allotment polytunnel, here are the things we would suggest considering before you buy.
Do I need permission for a polytunnel on my allotment?
In most cases, a domestic size polytunnel does not need planning permission. However, an allotment is slightly different from your own garden because you are usually working within the rules of an allotment association or local council. Your site may have its own requirements about the size, position or number of structures you can have.
Before ordering a polytunnel, it is therefore worth checking your tenancy agreement and speaking to your allotment committee or council. It is much easier to find out what is allowed before you buy than to discover afterwards that your tunnel needs to be moved.
Most allotment sites do allow polytunnels, but the rules can vary. For example, some councils specify the maximum size allowed or require permission from the allotment association before a tunnel is constructed.
If you’re unsure about planning permission, our planning permission FAQ explains the general position and the circumstances where you may need to seek further advice.
What size polytunnel fits an allotment?
A traditional full size UK allotment is around 250 square metres (10 rods), while a half plot is around 125 square metres (5 rods). Of course, allotment plots come in all shapes and sizes, so don't assume that you need to fill a particular amount of space with your polytunnel.
The aim is to find a balance. A polytunnel can provide a huge amount of productive growing space, but you will still want room for outdoor beds, fruit bushes, compost bins, a shed, water butts, paths, and a place to sit and relax.
For many allotment holders, 6ft and 8ft wide polytunnels are the sweet spot. They give you useful growing space without taking over a large proportion of the plot. Our 6ft wide polytunnels are particularly useful where space is tight, while our 8ft wide polytunnels give you more room to work inside.
If you have a narrow plot, consider a longer, narrower polytunnel to make the most of the space available. This can give you plenty of growing space while leaving room down either side of your plot. You can also make good use of vertical space with crops such as tomatoes, cucumbers and climbing beans.
If you have more room, 10ft or 12ft wide polytunnels give you greater flexibility for beds, paths and staging. Our polytunnel size guide is worth looking at before you settle on a size, and remember to leave enough space around the outside for somebody to physically work on the tunnel and carry out maintenance.
What should I look for in an allotment polytunnel?
If your allotment is exposed, we would pay particular attention to the frame, cover and anchoring system. A polytunnel is only as good as the materials used to build it, and a cheap tunnel can be a false economy if it struggles with wind or needs replacing after a few seasons.
Look for a galvanised steel frame rather than a cheaply painted steel frame. Galvanising protects the steel from corrosion, and the size and strength of the steel used in the hoops also make a difference. Premier Polytunnels use Z35 high tensile galvanised steel and large diameter hoops on our garden tunnels.
The cover matters too. A good quality polythene cover should be UV stabilised so it can withstand years of sunlight, and features such as thermal and anti drip properties can make a real difference to the growing environment. Our standard garden polytunnel cover is 600 gauge/150 micron, 5-layer, Thermal Anti Drip polythene, with a 4-year warranty against UV degradation.
Then think about how the polytunnel will be secured. Allotments can be surprisingly exposed, particularly if your plot is on the edge of a site. Anchor plates provide a way of securing the framework into the ground without using concrete and are particularly important when fitting a cover to base rails.
Finally, check exactly what you are getting for your money. A standard ‘Premier’ garden polytunnel kit includes the steel framework, consisting of foundation tubes, hoops, corner stabilisers, and ridge, plus a timber door frame and hinged door at the front, a timber end frame with dummy door at the rear, Anti Hot Spot Tape, and the Thermal Anti Drip cover. Things such as anchor plates, crop bars, storm strengthening collars, base rails, ventilation, and irrigation are optional additions.
Our guides to what's included in a standard kit and which polytunnel accessories you need are useful when comparing different suppliers.
How much does an allotment polytunnel cost?
There is quite a wide range of prices, so it is important to compare what is actually included rather than simply looking for the cheapest tunnel. The price will depend on the width and length of the polytunnel, as well as the cover specification, doors and accessories you choose.
A standard polytunnel kit is therefore different from a fully equipped tunnel. You might decide that you want anchor plates for additional anchorage, crop bars for hanging baskets, base rails for easier cover tensioning, side ventilation, or an irrigation system. You don't necessarily need everything on day one, and many accessories can be retrofitted.
It is also worth being wary of very cheap polytunnels. A low-priced kit may use lighter steel, a less suitable cover or have fewer components included. You may save money initially but spend more replacing parts or the whole structure later.
A well-built polytunnel is a long-term investment. Our frames are made from Z35 high tensile galvanised steel and are expected to last 20 years or more, while the cover will normally need replacing periodically.
You can read more about the expected lifespan in our guide to how long a polytunnel lasts.
Can I build an allotment polytunnel myself?
Yes. Building a garden polytunnel is a realistic DIY job, and it is something many of our customers choose to do themselves. We recommend having two people for the job, particularly when it comes to putting the cover over the frame.
How long it takes depends on the size of the polytunnel, the weather, ground conditions, and your DIY experience. Many customers can build a standard garden tunnel over a weekend, although it is worth allowing yourself plenty of time rather than rushing the job.
All of our polytunnels come with a detailed printed construction guide and parts checklist, and we also have step-by-step construction videos available on YouTube. You can find the relevant instructions in our garden polytunnel construction guides.
And if you get stuck, you don't have to work it out alone. Our Construction Advice Helpline is available 7 days a week until 9pm. It's there for those moments when you are halfway through a job and simply want to speak to somebody who knows our polytunnels.
If you'd rather leave the construction to somebody else, we also offer a polytunnel construction service in many areas of the country.
What can I grow in an allotment polytunnel?
This is where having a polytunnel really starts to pay off. You can use it throughout the year rather than thinking of it as somewhere that is only useful in summer. In spring, it is ideal for getting seedlings established and giving young plants a head start. Once the weather warms up, you can grow crops such as tomatoes, peppers, cucumbers, aubergines, and chillies that benefit from the extra warmth and shelter.
In autumn, you can follow summer crops with salads, spinach, oriental leaves, and other crops that appreciate some protection. During winter, hardy crops such as winter salads and brassicas can continue growing under cover.
On an exposed allotment, the shelter can be just as valuable as the extra warmth. In a polytunnel, plants are protected from strong winds and heavy rain, and you have much more control over watering and growing conditions.
You can also think about companion planting. For example, basil can be grown alongside tomatoes, while herbs, salads and flowers can be fitted around your main crops to make better use of the available space.
Our growing guides cover crops and seasons throughout the year, while our guides on growing in winter and what to grow in a polytunnel are good places to start.
Can I share a polytunnel with other allotment holders?
Yes, sharing a polytunnel can be a good way to make the cost and work more manageable, particularly if you have neighbouring plot holders who want a little extra growing space.
Before you buy, agree how you will split the cost and, more importantly, how you will divide the growing space. It is worth deciding who will be responsible for watering, ventilation and general maintenance too.
If you are sharing, it usually makes sense to choose a larger polytunnel so that everybody has enough room. Our 10ft wide and 12ft wide polytunnels give you considerably more usable space than the narrower models and allow you to create separate beds or growing areas.
Just check that your allotment site allows shared structures and that the proposed size is within its rules before ordering.
How do I get the most from my allotment polytunnel?
The best way to get more from your polytunnel is to plan how you are going to use the space before you build it. Think about where your beds and paths will go, and make sure you can comfortably reach everything. Raised beds can make the tunnel easier to manage, while ground beds give you maximum flexibility for larger crops. Leave enough room to walk, water and harvest without having to climb over plants.
Crop bars are useful in a smaller polytunnel because they allow you to support climbing plants and hang items such as baskets and irrigation equipment.
Ventilation is also important. Opening the doors and using side ventilation helps prevent the polytunnel becoming excessively hot, particularly in summer. An automatic irrigation kit can save time during busy periods, while staging and shelves give you additional growing and propagation space without using more floor area.
Finally, think about the whole year rather than just your first summer. Plan what will follow your tomatoes, where you will start next year's seedlings, and which areas can be used for winter crops. A little planning now can make the polytunnel much more productive.
You can browse our full range of polytunnel parts and accessories and growing aids, or explore our growing guides for ideas on getting the most from your polytunnel throughout the year.
If you're still not sure which size or specification is right for your allotment, give our friendly team a call. We've been helping people choose and build polytunnels for decades, and we're always happy to talk through the options.


